Preparation Instructions:
Fill all holes with wood filler and let dry. Apply additional coats of wood filler as needed. When wood filler is completely dry, sand the project in the direction of the wood grain with 120 grit sandpaper. Vacuum sanded project to remove sanding residue. Remove all sanding residue on work surfaces as well. Wipe project clean with damp cloth. It is always recommended to apply a test coat on a hidden area or scrap piece to ensure color evenness and adhesion. Use primer or wood conditioner as needed.
http://ana-white.com/2011/08/18-doll-mattress-sewing-tutorial
ABOUT PROJECT
Author Notes:
I'd be the first to tell you that sewing intimidates me.
Because a board does what I tell it too. And it stays straight when I cut it. Fabric, well, doesn't. At least not for me.
I've sewed doll mattresses before in the traditional "box cushion" style, which means cutting six different pieces of fabric, and then accurately sewing them together in a 3D box, with corners matching. It was never a fun or easy process.
But this time, Grace Grandma showed me something really neat. And 10 times faster. All you do is sew two squares of fabric together, and then you clip the corners with seams, and you've got a box cushion without all the fuss!
I could not believe how easy this doll mattress was to make for Grace's American girl doll. In this tute, I've included how to size for any size doll mattress (or even a dog bed or nap mat or floor cushion!) and you can skip the tufting to save steps.
MATERIALS AND TOOLS
Shopping List:
For one mattress finished size 10" x 19" I used:
1/2 - yard of fabric
Thread
Stuffing from recycled pillows and stuffed animals
Mix-matched buttons
CUT LIST
Cut List:
2 - Pieces of Fabric 2 1/2" wider and 2 1/2" longer than the desired finished mattress size (for 2" thick mattress)
GENERAL INSTRUCTIONS
Please read through the entire plan and all comments before beginning this project. It is also advisable to review the Getting Started Section. Take all necessary precautions to build safely and smartly. Work on a clean level surface, free of imperfections or debris. Always use straight boards. Check for square after each step. Always predrill holes before attaching with screws. Use glue with finish nails for a stronger hold. Wipe excess glue off bare wood for stained projects, as dried glue will not take stain. Be safe, have fun, and ask for help if you need it. Good luck!
STEP 1
Determining Size
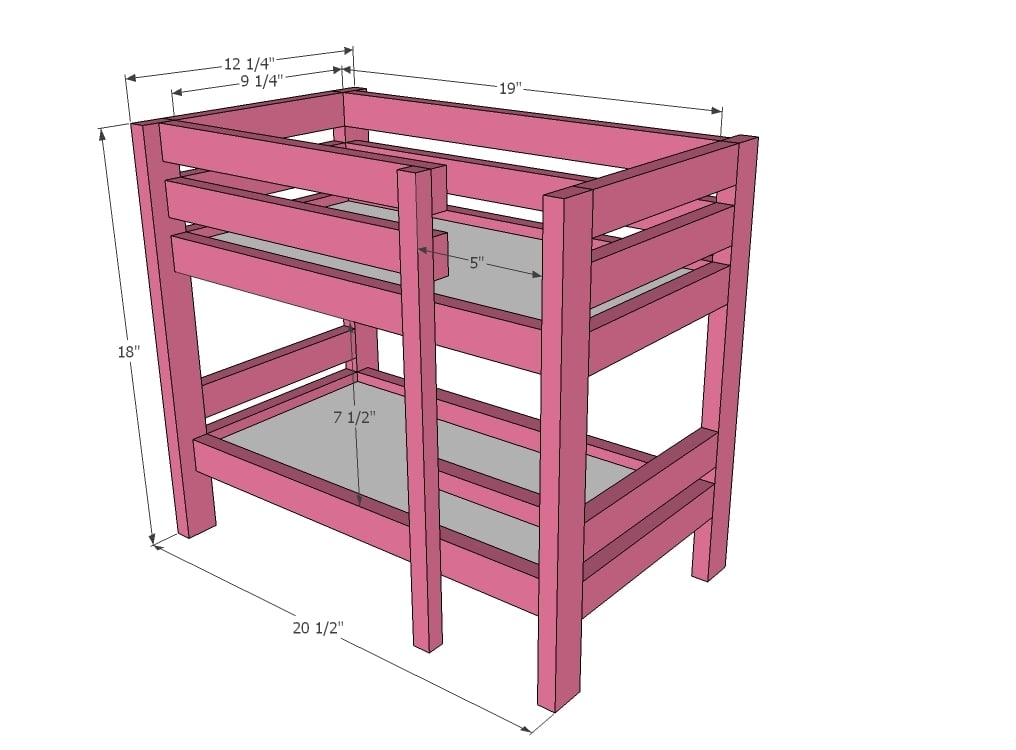
Determine the desired length and width of your doll mattress. For Grace's American Girl, we decided to make the mattress overall 10" x 19" finished dimensions. This also fits the doll bunk bed (shown in photos and plans available here).
Then add 2 1/2" to each of these dimensions. For Grace's American Girl bed, the dimensions are 12 1/2" x 21 1/2". Cut two pieces of fabric to the determined measurements.
Sewing the Edges
Sandwich the two piece of fabric right sides together and pin. Baste with 1/4" inseams around all sides, leaving a 3" opening for inside/out-siding the doll mattress.
STEP 2
Clip Stitching Corners
Now this a little tricky, but once you "get" it you'll breeze through. Open up the corners so the seams you stitched in step 1 are matched up, and the corner forms a 90 degree angle, with the seam down the center. Pin. Then line a ruler up with this seam and mark a 2" clip off the corner. Sew a seam right on the mark you made.
Grandma did the sewing on this one. We are giving these mattresses away as a gift, and her sewing is so much better than mine.
STEP 3
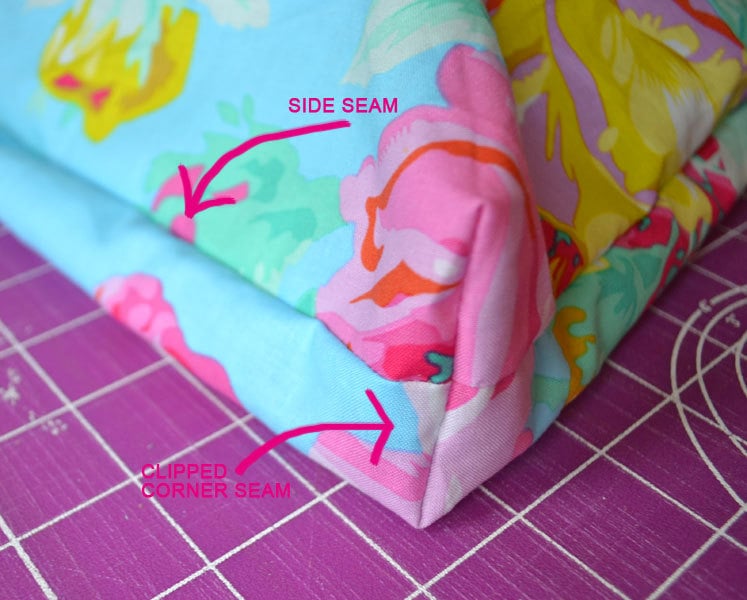
Seam Check
If done correctly the seam will look like the above diagram, and you can see the mattress taking on a box cushion like shape.
STEP 4
Finished Corners
Once you have clipped seamed all four corners, inside outside the mattress and check your corners. They should look like this corner.
Filling
You can fill the mattress with 2" thick foam, bean bag filler, or in our case, recycled pillow and stuffed animal stuffing. If you use pillow stuffing, fluff and fill but don't overfill. Hand stitch opening closed.
STEP 5
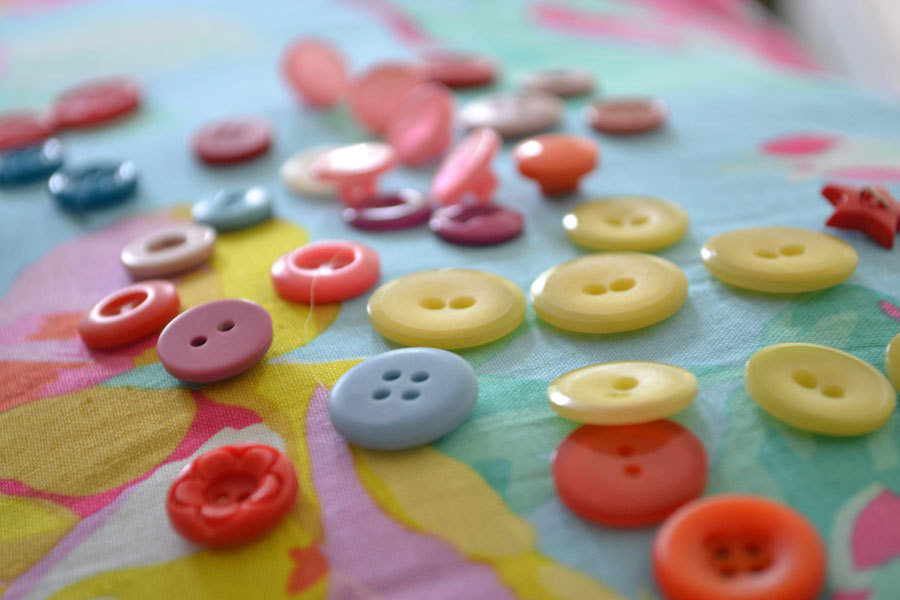
Picking Buttons
Certainly at this stage your mattress could be complete. But we (Grace's Grandma and me) felt the mattress could use a little something extra. And we also felt some tufting would help keep the stuffing in place. So Grandma brought over her button jar and we picked through and found mis-matched buttons in colors that matched the mattress fabric.
Would love to see simple natural cotton fabric with mismatched colorful buttons!
STEP 6
Layout Buttons
Next, lay the buttons out in a desired pattern. Note that you will need twice as many buttons, for the top and bottom. Once you are happy, mark the location of the buttons on front and back.
STEP 7
Pin Mattress
You will want to pin the mattress in multiple locations just to keep the mattress tops and bottoms from "moving" as you sew buttons on and ending up crooked.
STEP 8
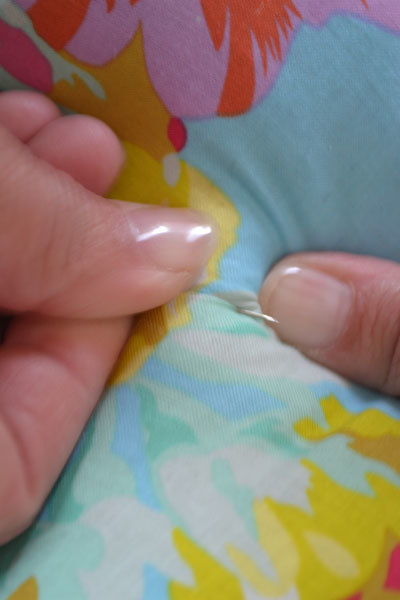
Sew Buttons
Then just start sewing the buttons on, one on top and one on the bottom.
STEP 9
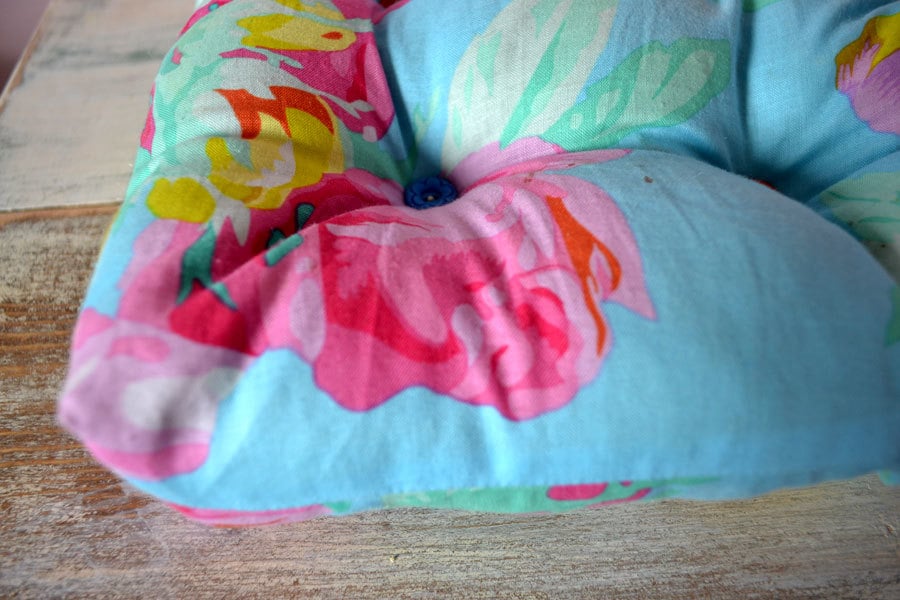
Admire Your Hard Work
Oh yeah, looking pretty! Keep it up!
STEP 10
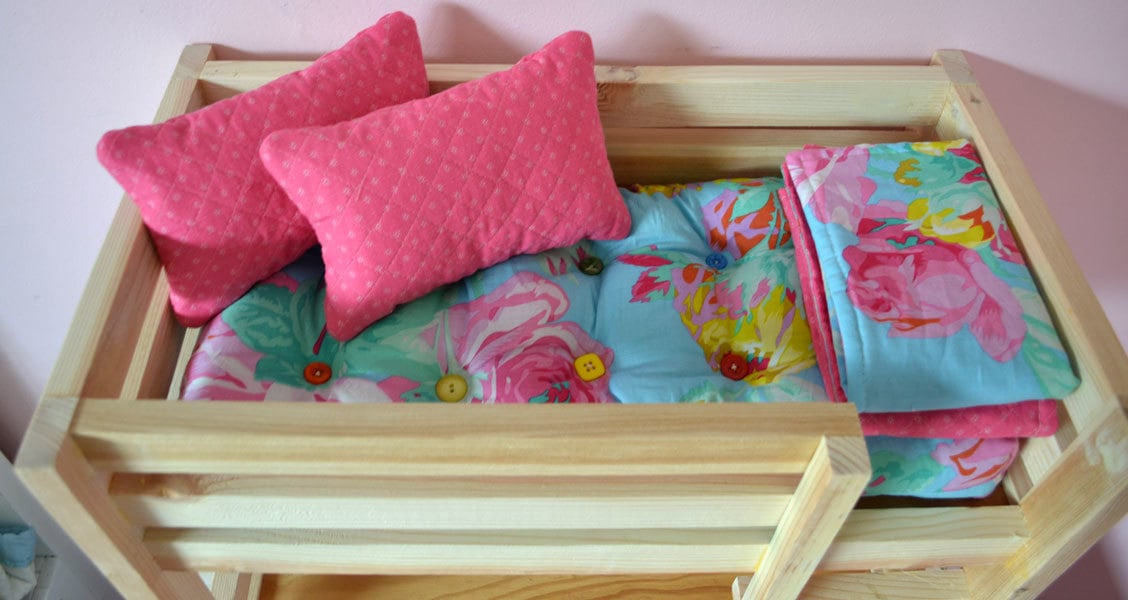
Pillows and Blankets
With the remaining fabric scraps, Grace's Grandma made a blanket. From her scraps from the 80's she found this quilted fabric and made a few pillows as well. Just figure the finished dimensions, add 1/2" to length and width, cut and sandwich right sides together (step 1), inside outside and stuff.
STEP 11
No Buttons
And I wanted to show you that you don't have to have the buttons. You can make this mattress in just two simple step.
I built this bunk bed with my dad last year after I got McKenna. One adjustment that I would make though is the bottom bunk having a little more space between it and the top bunk because McKenna's head hits the top bunk and she can't sit up all the way. I also had an idea that you could use these instructions with a few changes to make a loft bed as well. Thats what I might do with the next one I make. I think that it would look really cool. Or you could make a top bunk going one direction and then the bottom bunk going to opposite that would be cool too. Its actually quite easy to make just go to the website to download the downloadable instructions and print them and then your set. Have Fun!!!


